
Photo of the famous Sydney Opera House with blue sky enhanced in Lightroom
How to Enhance a Blue Sky
In Lightroom 4, the Color control allows separate control of red, orange, yellow, green, aqua, blue, purple, and magenta:
Lightroom 4 Color Controls
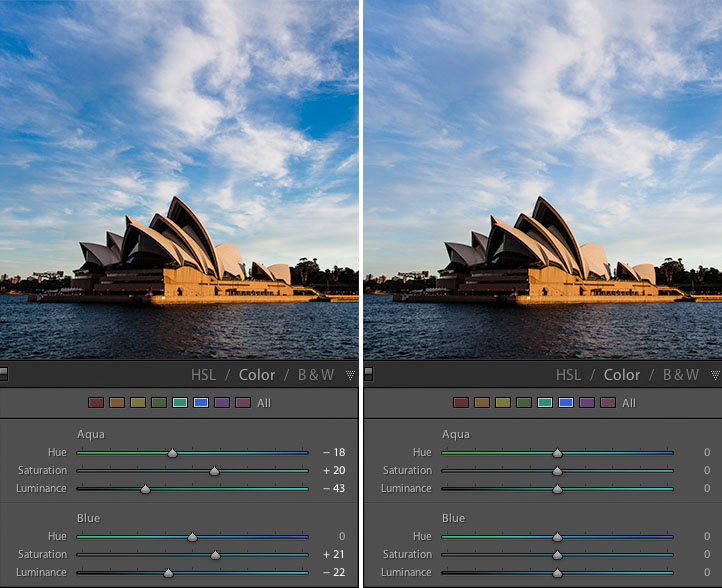
With and without color adjustments
Aqua
- Hue: -18
- Saturation: +20
- Luminance: -43
- Hue: 0
- Saturation: +21
- Luminance: -22
Make a Develop Preset
For extra credit, save these settings as a develop preset so that you can quickly apply them later. Note that settings that work to bring out the sky in one photo won’t be perfect for all photos, but this should give you a good starting point.Here are the settings you need to capture for a sky enhancing preset:

Settings for a sky-enhancing Lr preset
I hope this technique proves useful next time you have a sky that needs just a little more oomph. I’d like you hear your thoughts on this article, please comment below or feel free to connect with me through Facebook or Google+. I’ll do my best to answer questions and reply to comments.
Post originally from: Digital Photography Tips.