1. Dramatic Lighting
You will notice that in the majority of good portraiture, dramatic lighting is often a key element. It’s not too often you’ll find ‘flat’ lighting in a great picture (not to say it can’t be done however). It will either result in the lighting that appears directly on the person or dramatic lighting between the subject and the foreground or background. For example, in the images of Bilbo and Thorin Oakenshield, there is dramatic, directional lighting on their faces. There are many ways that dramatic lighting can manifest itself or be achieved.2. Deep Blacks and Good Highlights
You may also notice in images created by someone who knows how to process their images, they’ll have excellent tonal range. The images from The Hobbit capitalize on this. Proper images have some deep blacks and some highlights as well. This is also another way to avoid having your image appear ‘flat.’ It doesn’t necessarily have to be a great deal of each, just so long as you’re touching on both ends of the spectrum. Some photographers like to use filters or they have a style of slightly muting everything which minimizes tonal range. This is fine. There are times when the photographer can make a decision not to have a high contrast image. They still produce a great image, however this style is to be intentional and purposeful.
3. Interesting Foregrounds and Backgrounds
Another element that can really enhance an image is including interesting foregrounds or backgrounds. These are two things that always need to be considered one way or the other. It’s very easy, especially if you’re new to photography, to forget about these and end up with distracting backgrounds or foregrounds. However, do not simply avoid them; they are useful tools to achieve a stronger image. Look at every example image from the movie. Don’t the backgrounds give interest, setting, and help tell a story? That’s what we’re wanting.4. Find Unique Angles
Don’t be afraid to try new angles. It’s easy to get stuck in a rut of taking pictures from the same angle or height. Try spicing it up some; you may be shocked. Get high. Get low. Back away. Get close. This can add some variety to your shots and help you find a real keeper.5. Be Color Smart
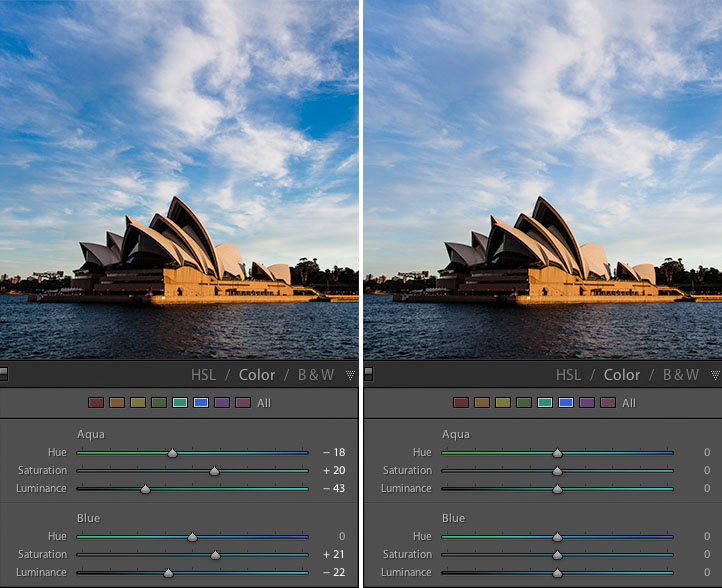
Be very aware of how your colors and image temperatures are telling a story. Are your colors too bright and vibrant or too muted? How does this affect the mood? Is the image temperature cold and moody or warm and cheerful? These are things that can be fined-tuned to help narrate your image. If you’re wanting a dramatic image like Gandalf’s photo, then a warm temperature would not be desired. Chances are you could put more thought into these details to improve your images. So often we take the picture concerned only with composition, lighting direction, and subject when the color can be considered more thoroughly.
6. Mind the Sky
If shooting outdoors, instead of allowing the sky to be a blown-out nuisance, view it as a resource, and use it to your advantage. Now, this may not always be possible due to equipment, desired effect, or setting. But there are ways that you can properly capture the clouds or the blue of the sky. You could either expose for the sky and light the subject with additional lighting, use HDR, or find a proper exposure with natural light that works for both your subject and the sky. But don’t always avoid the sky; learn to tame it. Notice the drama it adds to Gandalf and Bilbo’s images.7. Don’t Use Shallow Depth of Field Every Time
Using a very large aperture and creating a shallow depth of field can be a great affect for portraiture and many other types of photography. This doesn’t mean, however, that it is the only effective use of DOF. Use a large DOF every so often, especially if your background could amplify the effect of the image. Make the image sharp throughout the entire image. Play around with both and learn in what situations it works best.David Wahlman is a wedding and portrait photographer from Redding, CA. He works all around California and is aiming to get into destination photography. You can see his best work at www.wahlmanphotography.com and follow his updates on his facebook page.
Post originally from: Digital Photography Tips.